
So, you’ve got an ugly oil stain on your concrete driveway or garage floor. You’ve tried scrubbing it, but that dark spot just laughs back at you. What gives?
The real problem isn’t your cleaning technique; it’s the concrete itself. It might look and feel like a solid rock, but on a microscopic level, concrete is more like a very hard sponge. It’s full of tiny pores and channels that are just waiting to soak up any liquid that lands on them.
When oil hits the surface, it doesn’t just sit there. It immediately starts wicking its way down into that network of pores, kind of like how a paper towel soaks up a spill. A quick wipe might get the surface oil, but the real stain has already worked its way deep inside, which is why it sticks around.
Why Oil Stains on Concrete Are So Stubborn
Dealing with a fresh spill versus a stain that’s been there for months are two completely different ballgames. The age of the stain is the single biggest factor in how hard it will be to remove.
The Challenge of Old vs New Spills
If you catch an oil drip right after it happens, you’re in luck. The oil is still liquid and hasn’t had much time to travel deep into the concrete. You can often stop it in its tracks with some quick action, making the cleanup process a whole lot easier.
An old stain, on the other hand, is a much tougher opponent. After weeks or months of sitting there, especially baking in the sun, the oil goes through some changes. It starts to oxidize and thicken, almost like it’s bonding directly with the concrete. The sun’s heat acts as a catalyst, basically cooking the oil into a stubborn, semi-solid gunk that’s locked deep within the pores.
The secret to getting rid of an oil stain isn’t about scrubbing harder. It’s about using the right method to pull the oil out of the concrete, reversing the process that got it in there in the first place.
This is why understanding the “why” is so important for picking the right “how.” Here’s a quick rundown of what makes old stains such a headache:
- Deep Penetration: The longer the oil sits, the deeper it goes. Eventually, it’s so far down that surface cleaners can’t even touch it.
- Chemical Bonding: Over time, oil breaks down and its molecules can actually form chemical bonds with the minerals in the concrete. It’s no longer just a spill; it’s become part of the surface.
- Thick and Sticky: Old oil gets viscous and sticky. It won’t respond to simple liquid cleaners that work wonders on fresh, fluid spills.
This is exactly why the methods we’ll get into next aren’t just about surface cleaning. They rely on things like poultice pastes that act like a chemical magnet or powerful degreasers that break those bonds. These techniques are designed to draw that stubborn, embedded oil back up to the surface so you can finally get rid of it for good.
Your First Move For Fresh Oil Spills
When you see that fresh, glistening puddle of oil on your concrete, the clock starts ticking. What you do in the next few minutes can make the difference between a quick cleanup and a stubborn, dark stain that becomes a permanent eyesore on your driveway. The goal here is simple: stop that oil from seeping deep into the concrete.
Your gut reaction might be to grab an old rag and start wiping. Don’t do it. Rubbing a fresh oil spill is one of the worst things you can do—it just grinds the oil further into the concrete’s pores, turning a surface-level problem into a deep-set mess. Your top priority is absorption. You need to lift the excess oil off the surface before it has a chance to soak in.
Choosing Your Absorbent Material
The good news is you probably already have what you need sitting in your garage or kitchen pantry. You’re looking for a dry, granular, or powdery material that can act like a sponge and draw the oil out.
You’ve got a few great, readily available options:
- Clay Cat Litter: The classic, non-clumping kind is a garage staple for a reason. It’s incredibly absorbent and perfect for this job.
- Baking Soda: That box in your fridge or cupboard is a fantastic oil absorber. Don’t be afraid to use it generously.
- Cornstarch: Just like baking soda, cornstarch is a fine powder that does an excellent job of pulling oil up from the surface.
- Sawdust: If you do any woodworking, sawdust is another fantastic choice for soaking up fresh spills.
The most important thing is to act fast. Whichever absorbent you choose, getting it on the spill within minutes can prevent up to 90% of the oil from permanently staining your concrete.
This simple flow chart really breaks down the immediate actions you need to take.
As you can see, a quick and effective response is straightforward.
When you’re dealing with a fresh spill, you often have to grab whatever is closest. Here’s a quick rundown of some common household materials that can save the day.
Quick Guide to DIY Absorbent Materials
| Material | Effectiveness | Application Tip |
|---|---|---|
| Clay Cat Litter | Excellent | Use the cheap, non-clumping kind. It’s more porous and works better than premium clumping litters. |
| Baking Soda | Very Good | Its fine texture is great for wicking oil out of small pores. Best for smaller, thinner spills. |
| Cornstarch | Very Good | Similar to baking soda, it works well but can be a bit more expensive to use on a large spill. |
| Sawdust | Good | Fantastic if you have it, but it can be messy. Works best if it’s fine and completely dry. |
No matter which one you grab, the goal is the same: soak up as much of that oil as you can, as quickly as possible.
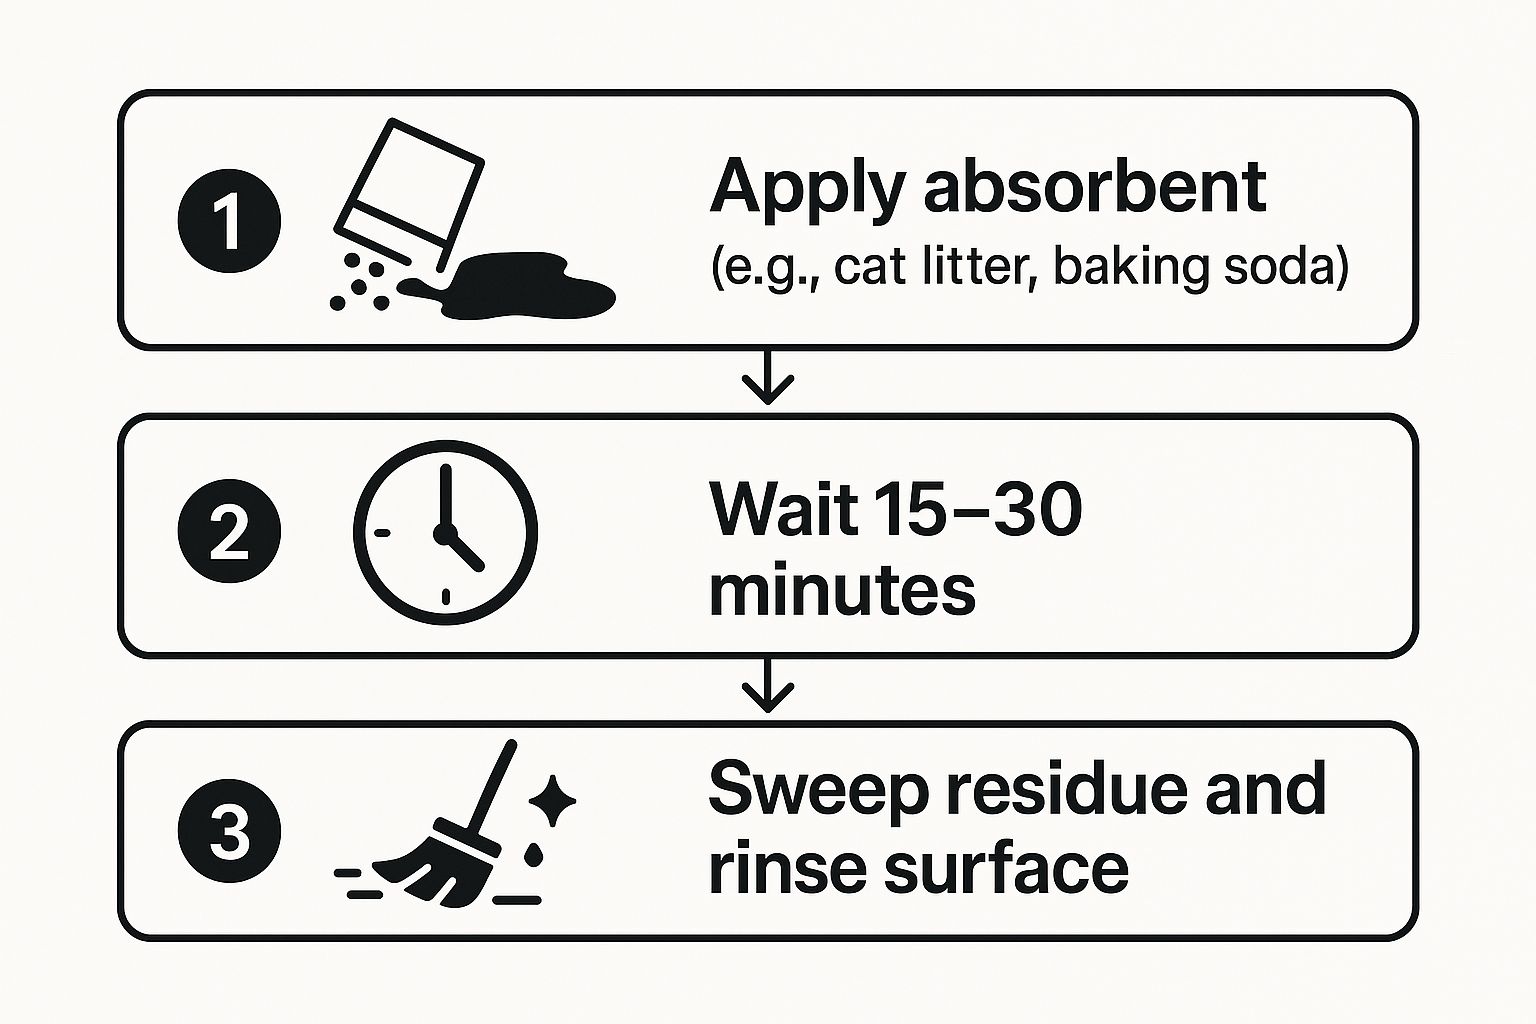
The Correct Application Technique
Once you’ve picked your absorbent, don’t be stingy. Completely cover the fresh oil spill, creating a thick layer that’s at least a quarter-inch deep. Make sure you extend the material well beyond the edges of the puddle.
Gently press the absorbent down with your foot or a scrap piece of wood. You want to ensure it makes solid contact with the oil everywhere.
Now for the hard part: waiting. You need to give the material time to do its job. Let it sit for at least 15 to 30 minutes, though a few hours is even better if the situation allows. You’ll see the material slowly darken as it wicks the oil out of the concrete.
Once it looks like it has absorbed as much as it can, just sweep up the saturated material and dispose of it properly. Getting this first step right is the foundation of learning how to remove oil stains from concrete, as it drastically reduces the heavy lifting you’ll have to do later.
Using a Poultice to Pull Out Set-In Stains
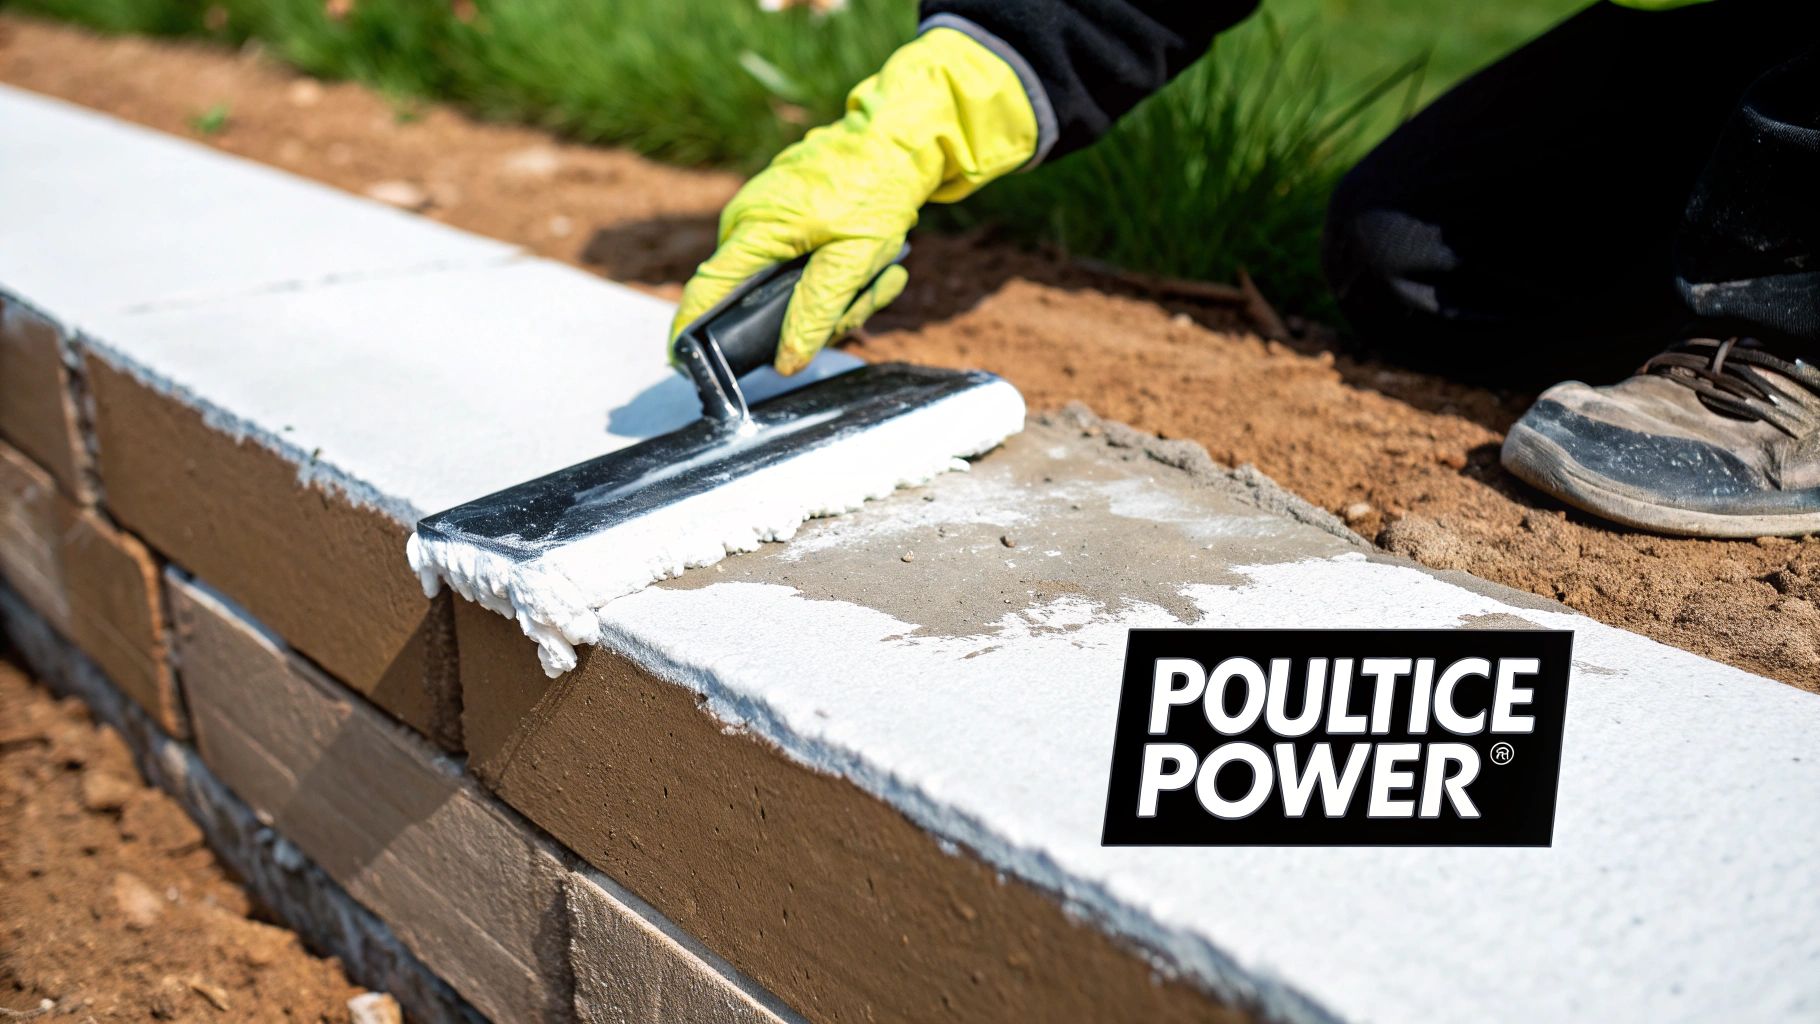
When you’re dealing with an old, dark oil stain that’s practically become part of the concrete, just soaking it up isn’t an option. The oil has worked its way deep into the pores, and you need a way to pull it back out. This is exactly what a poultice is designed to do.
A poultice is essentially a thick paste you make by mixing an absorbent material with a solvent. You slather it over the stain, and the solvent gets to work dissolving the hardened oil. As the paste dries, the absorbent material wicks that oily mixture right out of the concrete. It’s like a chemical magnet, reversing the staining process.
Crafting a DIY Poultice at Home
You don’t need anything fancy to whip up a powerful poultice. Most of the ingredients are probably already in your garage or kitchen. The trick is to combine an absorbent powder with a liquid solvent until it has a consistency like thick peanut butter—easy to spread but not runny.
Baking soda is a fantastic and cheap absorbent base, perfect for garage floors and driveways.
- The Absorbent: Good old baking soda works great.
- The Solvent: Acetone is your heavy hitter here for breaking down tough oil. You can find it in nail polish remover. If you want a milder option, water can work too, it just won’t have the same dissolving power.
To mix it, just slowly add the solvent to your baking soda until you get that thick paste. If you’re using acetone, make sure you’re in a well-ventilated space.
Applying and Removing the Poultice
Once your paste is mixed, the application is simple, but it does require some patience.
First, spread a generous layer of the poultice right over the oil stain. You’re aiming for about 1/4-inch thick, and make sure to extend it an inch or so beyond the stain’s edges.
Next, cover the whole patch with plastic wrap and tape the edges down securely. This step is crucial because it traps the solvent, preventing it from evaporating too fast and giving it more time to dissolve the oil.
Now comes the hard part: waiting. The poultice needs to dry out completely. This could take a few hours or even a full day, depending on the weather. You’ll know it’s working when you see the paste darken as it pulls the oil from the concrete.
Once it’s totally dry and brittle, use a plastic scraper or a stiff-bristled brush to break it up and sweep it away. Give the area a final rinse with water. Don’t be surprised if a really stubborn stain needs a second round to get everything out.
Pro Tip: Whatever you do, don’t scrub the wet paste. The real work happens as the poultice dries and lifts the oil out. Rushing this step will only reduce its effectiveness. Let it dry completely!
When to Choose a Commercial Product
While a homemade poultice is surprisingly effective, some stains are just on another level and need a professional-grade solution. Commercial poultice treatments have become a go-to for professionals because they work so well on deep, set-in stains.
These products often use proprietary chemical blends that create a paste designed to chemically bond with oil hydrocarbons. This allows them to pull the oil straight up to the surface without accidentally pushing it deeper, which can sometimes happen with other methods like pressure washing. If you’re curious, you can find out more about how these professional-grade removers work and see why they’re often the best choice for the most challenging concrete stains.
Going Green: Modern and Eco-Friendly Cleaning Solutions
If you’re like me and cringe at the thought of pouring harsh chemicals all over your driveway, you’re in luck. The cleaning world has come a long way, and now there are some seriously powerful options that are also kind to the environment. We’re moving beyond old-school degreasers and into some pretty cool, green-friendly tech for tackling those stubborn oil stains.
One of the most impressive approaches I’ve seen is bioremediation. It sounds a bit like something out of a sci-fi movie, but it’s a real and incredibly effective process that uses living microorganisms to do the cleanup for you.
Unleashing the Power of Microbe-Based Cleaners
So, how does it work? These specialized cleaners are packed with dormant, oil-eating bacteria. When you apply the product to a stain, these tiny microbes essentially “wake up” and start munching on the hydrocarbons in the oil—it’s literally their food source.
This is the ultimate “set it and forget it” method. The microbes work quietly over days or even weeks, breaking down the oil into nothing more than harmless water and carbon dioxide. You don’t have to scrub, rinse, or worry about toxic runoff killing your prize-winning petunias or polluting the local watershed.
This approach is fantastic because it gets deep into the pores of the concrete, offering a sustainable way to remove even the most stubborn, deep-set stains without any risk of damage. If you’re curious to learn more about how these unique concrete cleaners work, MyCAF.com has some great information.
My Take: Bioremediation is the perfect play for the patient homeowner. If you prioritize environmental safety over lightning-fast results, this is your solution.
Green Solutions vs. Commercial Degreasers: A Quick Comparison
While microbial cleaners are amazing, I get it—sometimes you just need that stain gone now. That’s where modern, eco-friendly commercial degreasers come in. Many brands have stepped up, offering biodegradable, water-based formulas that are a world away from the solvent-heavy products of the past.
Let’s break down how these two options stack up against each other:
| Feature | Microbial Cleaners (Bioremediation) | Commercial Degreasers |
|---|---|---|
| Speed | Slow (days to weeks) | Fast (minutes to hours) |
| Effort | Low (apply and leave) | Medium (requires scrubbing) |
| Environmental Impact | Very Low (converts oil to H₂O/CO₂) | Low to Moderate (biodegradable) |
| Best For | Old, deep stains where time isn’t a factor | Fresh or moderately set stains needing quick removal |
A high-quality biodegradable degreaser can be the perfect happy medium. These products are formulated to break down oil and grease without the harsh chemicals you’d find in something like brake cleaner. They work by emulsifying the oil, which makes it possible to scrub it away and rinse it clean with minimal impact on the environment.
Of course, sometimes the stain is right up against more delicate surfaces, like painted siding or wood trim. In those cases, a high-pressure approach is out of the question. You’ll want to look into a gentler cleaning method, and learning about an exterior soft wash can be a game-changer for cleaning around sensitive materials without causing damage.
At the end of the day, figuring out how to remove oil stains from concrete is all about balancing your need for speed with your desire to be eco-conscious.
How to Use a Pressure Washer the Right Way
When you’re staring down a stubborn oil stain on your driveway, grabbing a pressure washer can feel like the ultimate solution. It’s powerful, no doubt. But using one the wrong way can do more harm than good, and I’ve seen it happen many times.
Too much pressure can permanently etch your concrete, leaving ugly “wand marks” behind. Even worse, it can blast the oil deeper into the concrete’s pores, setting the stain for good.
The biggest mistake I see homeowners make is using the pressure washer as their first line of attack. Think of it as a final rinse, not the main event. You should always pre-treat the stain with a good degreaser or poultice first. Let that do the heavy lifting of pulling the oil out.
Setting Up for Success
Before you even pull the trigger, let’s talk about the gear. The nozzle you pick is just as critical as the pressure setting. Never, ever use a zero-degree (red) nozzle on concrete. It shoots a pencil-thin stream of water that will carve right into your driveway.
For concrete, you’ll want to stick with a wider fan-tip nozzle:
- A 25-degree (green) nozzle is my go-to for most jobs. It hits that sweet spot between cleaning power and surface area.
- A 40-degree (white) nozzle is a safer choice if your concrete is older, or if you’re just nervous about causing damage.
Now, for the pressure itself. For most residential driveways, you really don’t need more than 2,000 PSI. Going higher cranks up the risk of damage without adding much benefit for oil removal. If your pre-treatment worked, you won’t need brute force.
The Right Technique for a Flawless Finish
Once you’re ready to spray, remember this: smooth and steady wins the race. Rushing or being inconsistent will leave you with a streaky, blotchy mess that looks worse than the original stain.
Keep the nozzle about 8 to 12 inches away from the surface. Any closer and you risk etching the concrete. Start spraying a little ways off the stained area and then work your way in. Use a sweeping, side-to-side motion, slightly overlapping each pass. It’s a lot like spray painting—you’re aiming for even, consistent coverage to avoid stripes.
The goal of pressure washing isn’t to blast the oil out. It’s to thoroughly rinse away the degreaser and the loosened oil particles that your pre-treatment has already lifted from the concrete’s pores.
After you’ve rinsed the whole area, you have to let it dry completely to see the results. Don’t be surprised if a faint shadow of the stain remains, especially with older, deeper stains. That’s pretty common, and you might just need a second round of treatment.
To get a better sense of whether pressure washing is the right final step for your particular stain, you can read more about removing oil stains from Arizona driveways to see what local conditions and professional experience dictate.
Preventing Future Stains and Protecting Your Concrete
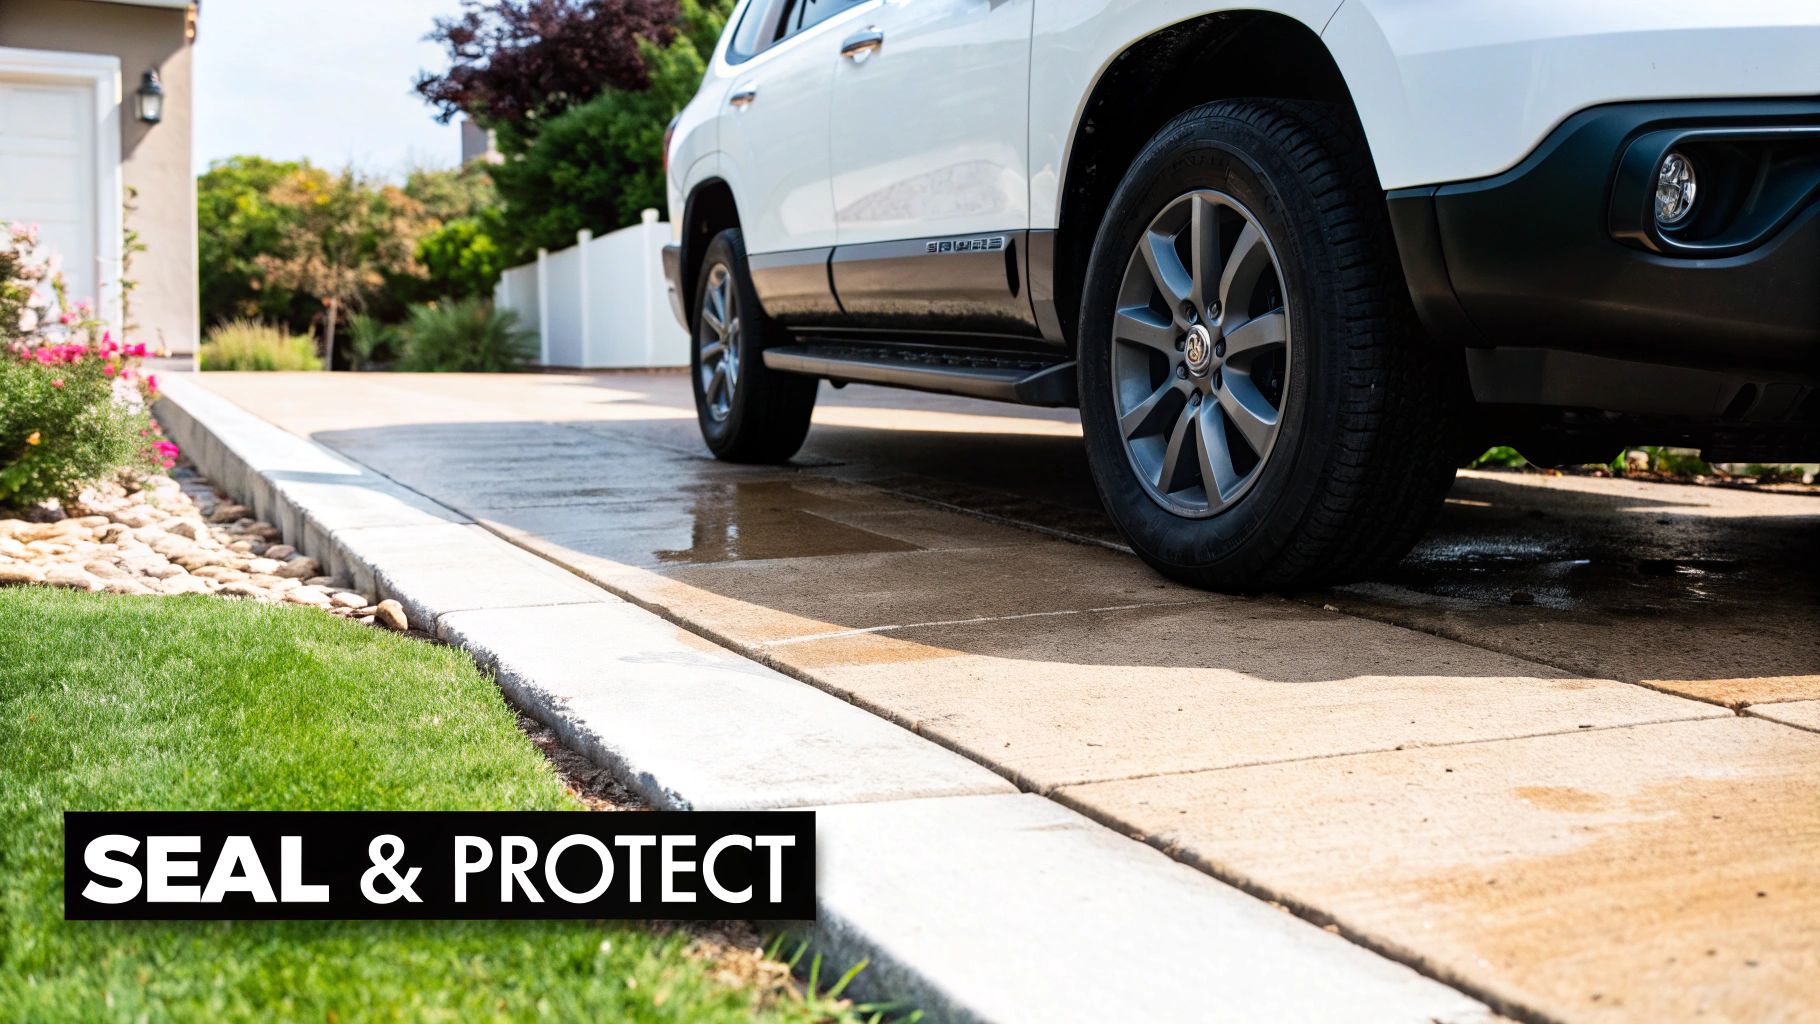
After all the work you’ve put in to get your concrete spotless again, the last thing you want to see is a fresh, dark oil splotch ruining your efforts. The truth is, the easiest way to deal with oil stains is to stop them before they even happen. A little proactive protection goes a long way and is a whole lot less work than scrubbing them out later.
Your best line of defense is a high-quality concrete sealer. Think of it as invisible armor for your driveway or garage floor. Concrete is naturally porous—it’s full of tiny holes that soak up liquids like a sponge. A good sealer sinks into those pores and creates a protective barrier right at the surface, preventing spills like oil, grease, and antifreeze from penetrating deep into the slab where they become a permanent problem.
Choosing the Right Concrete Sealer
Sealers aren’t a one-size-fits-all solution. They come in different formulas that offer varying levels of protection and can change the look of your concrete, so you’ll want to pick the one that best fits your situation.
- Silicate Sealers: These products actually penetrate the concrete and create a chemical reaction that makes the surface denser and harder. They’re fantastic for improving durability but only offer moderate resistance to stains.
- Acrylic Sealers: This is a very popular choice for residential driveways and patios. Acrylics form a thin protective film on top of the concrete, offering solid protection against both oil and water. They also come in different sheen levels, from matte to high-gloss.
- Epoxy or Urethane Coatings: If you want maximum, bomb-proof protection, this is it. These coatings are especially great for garage floors where spills are almost a guarantee. They create a thick, durable, and completely non-porous layer that oil simply can’t get through.
Applying a sealer is probably the single most important step you can take for long-term care. If you’re looking to protect outdoor surfaces like driveways or walkways, exploring professional paver sealing is a great investment for a durable finish that stands up to stains and harsh weather.
Simple Daily Maintenance Habits
Beyond sealing, a few simple habits can make a huge difference in keeping stains at bay. It’s all about catching spills fast and having a few layers of defense.
The secret to a permanently clean driveway isn’t some miracle product; it’s the combination of a sealed surface and good cleanup habits. A spill that’s wiped up in five minutes rarely has a chance to become a stain.
Try working these simple practices into your routine to keep your concrete looking its best:
- Use Drip Trays: If you’ve got an older car or one that’s known for a few drips, slide a large piece of cardboard or a dedicated drip tray under the engine. It’s an easy, cheap insurance policy.
- Act Immediately: Keep a bag of cat litter, baking soda, or another absorbent material in your garage. The second you spot a fresh drip, dump a generous amount on it. This will pull the oil right out before it has time to soak in.
- Regular Cleaning: Give your concrete a good sweep every so often to get rid of dirt and debris that can trap oily residue. Washing it down with a mild detergent and a hose every few months also works wonders to prevent grime buildup.
By pairing a quality sealer with these easy maintenance tips, you can protect your investment and keep your concrete looking brand new for years.
For a professional, worry-free approach to keeping all your exterior surfaces spotless, contact Velo Property Solutions. Our expert team provides comprehensive cleaning and sealing services to protect your property. Get your free estimate today!